UniConverter Guía de Usuario
-
A Comenzar
-
Video Convertidor
-
Editar Video
-
Video Compresor
- Comprimir video
-
Grabador de pantalla
-
Descargador
-
DVD Grabador
-
Fusionador
-
Convertidor de audio
-
Caja de Herramienta
- Imagen Convertidor | Wondershare UniConverter
- Creador de GIF | Wondershare UniConverter
- Corregir metadatos de video | Wondershare UniConverter
- CD Grabador | Wondershare UniConverter
- Convertir CD a MP3 | Wondershare UniConverter
- Convertir Video a VR | Wondershare UniConverter
- Transferir video / audio a un dispositivo iOS
- Transferir video / audio a un dispositivo Android
- Transferir video / audio a un disco duro externo
- Editor de subtítulos | Wondershare UniConverter
- Cómo recortar clips automáticamente con un clic
- Cómo agregar / eliminar marca de agua de videos fácilmente
- Eliminador de Fondos - Cómo eliminar el fondo de la imagene fácilmente
- Auto Reframe Video | Wondershare UniConverter
- Retrato de AI | Wondershare UniConverter
- Intro & Outro | Wondershare UniConverter
- Reproductor de Videos
FAQs
Video/Audio Soluciones
Cómo comprimir un video para reducir su tamaño
La función de compresión de video del software le permite cambiar el tamaño y reducir los archivos. Puede elegir la función de compresión automática del software o puede optar por seleccionar el tamaño de su archivo y otros parámetros para comprimir los archivos. También está disponible la vista previa de los primeros 20 segundos del archivo comprimido.
Cómo comprimir video para reducir el tamaño del video - Guía del usuario de Wondershare UniConverter (Win)
Los pasos para comprimir videos usando Wondershare UniConverter se enumeran a continuación.
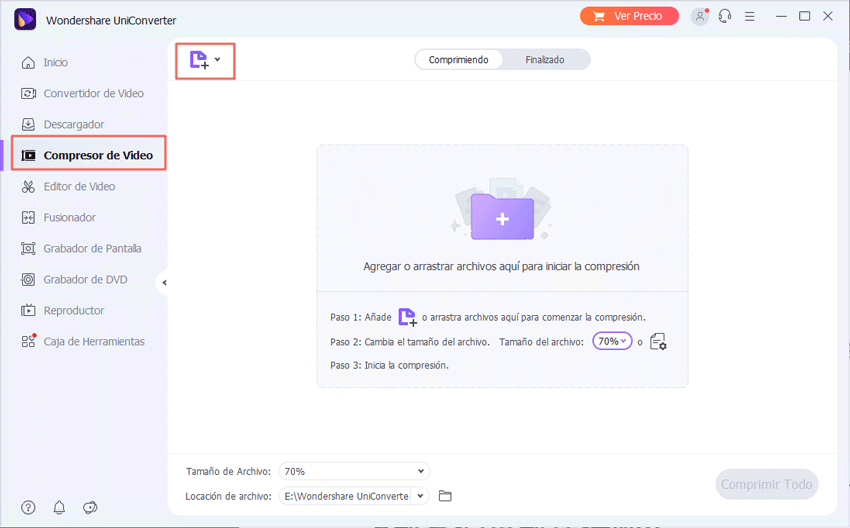
Paso 1 Elija la función de compresor del software.
Inicie el software Wondershare UniConverter en su PC y elija la función Video Compressor del panel del lado izquierdo en la interfaz principal.
Paso 2 Agrega videos para comprimir.
Haga clic en el signo + o  botón para navegar y cargar los videos a comprimir. También puede agregar una carpeta completa si es necesario.
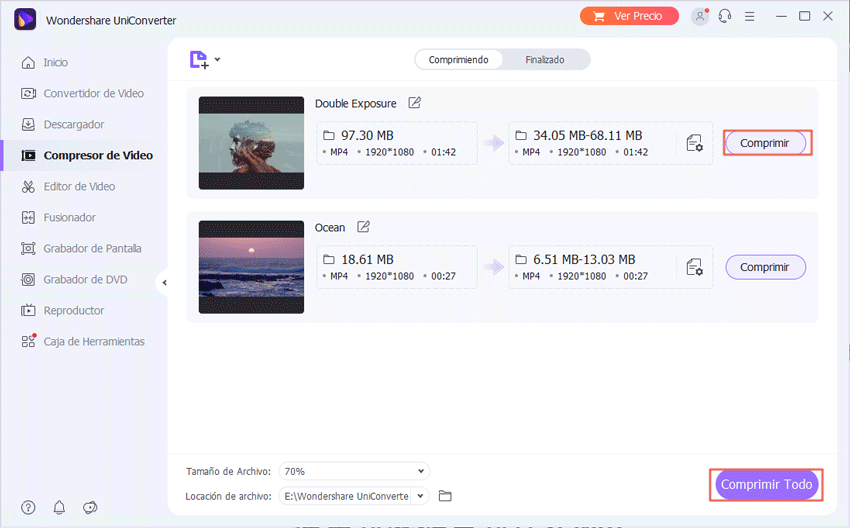
Paso 3 Seleccione el tamaño del archivo y otros parámetros.
Los videos agregados aparecerán con detalles y una imagen en miniatura. Haga clic en el icono de configuración y se abrirá una nueva ventana emergente. Mueva el control deslizante junto al Tamaño de archivo para seleccionar el tamaño y la calidad deseados, y la velocidad de bits cambiará en consecuencia. Incluso puede cambiar el formato y la resolución según sea necesario. Haga clic en el botón Aceptar para confirmar la configuración.

Haga clic en el botón Vista previa para ver el video comprimido.
Nota: En caso de que no desee realizar la configuración manual e ir con la configuración automática del software, puede omitir este paso y pasar al siguiente .
Paso 4 Comprimir video.
La ubicación del escritorio para guardar el archivo se puede seleccionar desde la pestaña Ubicación del archivo . Finalmente, haga clic en el botón Comprimir para comenzar a procesar el video. En la interfaz del software, los videos comprimidos se pueden verificar desde la pestaña Terminado .
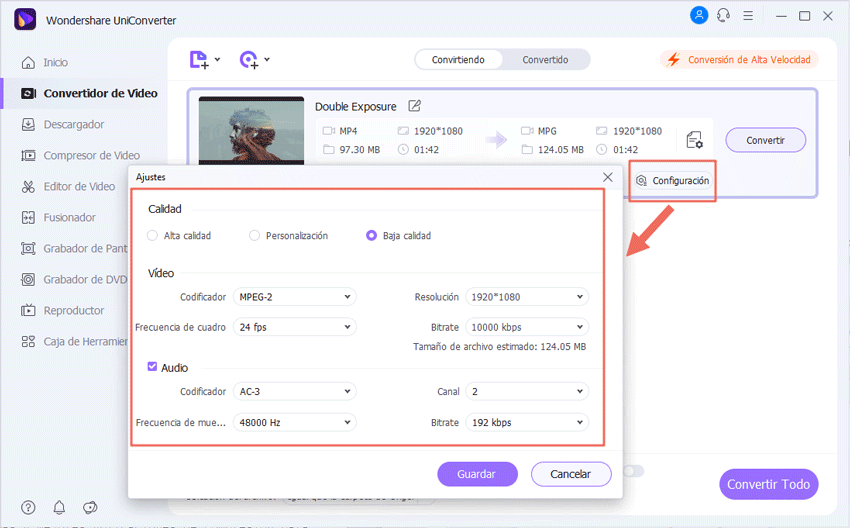
Nota: Otra forma de comprimir varios archivos con parámetros de compresión similares es utilizar la sección Video Converter . Mientras selecciona el formato de destino durante la conversión por lotes, puede cambiar la configuración y elegir la calidad del archivo, la velocidad de fotogramas, la velocidad de bits y la velocidad de fotogramas. De esta manera, se puede crear y seleccionar un nuevo formato personalizado para todos los archivos agregados.
Más Informaciones Útiles
Tu caja de herramientas de video completa